1. Make sure that the Thunderbolt Dock is plugged into your computer via Thunderbolt cable and that the blue LED light on the front of the dock is illuminated.
2. Connect your network cable to the Ethernet port located on the back of the unit.
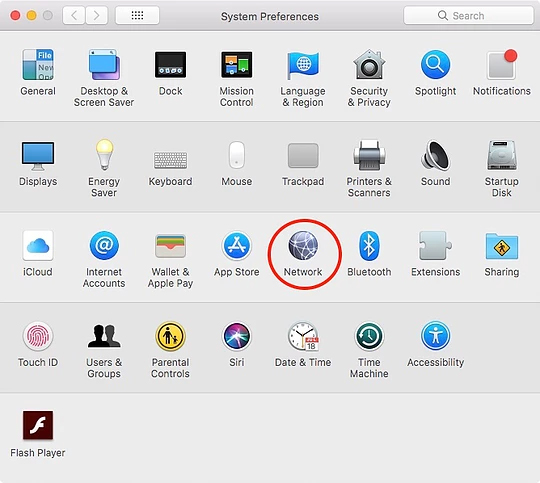
3. Verify the network connection by going into your system preferences and clicking on “Network.”

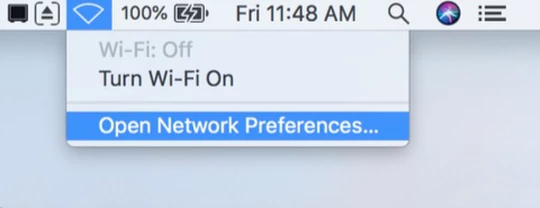
You can also access this by clicking on the WiFi symbol at the top right portion of your screen and clicking on “Open Network Preferences.”

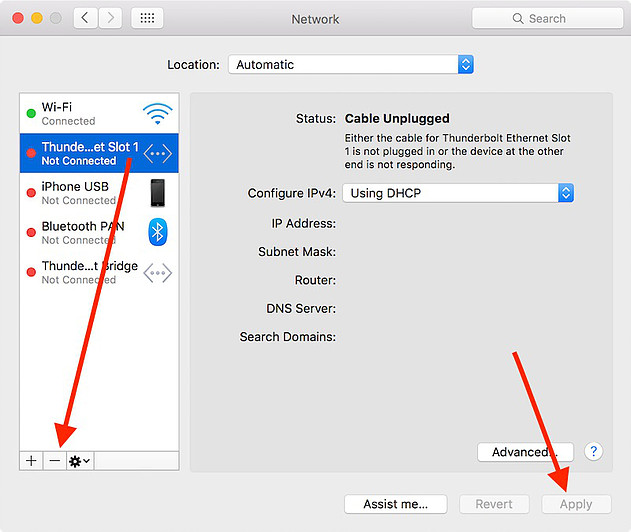
4. Once in Network System Preferences, you can verify your network connection by looking for the Green spot in the lefthand column next to the network connection labelled “Thunderbolt Ethernet Slot X”. The ‘X’ will be replaced by a number of some kind. You may need to configure the rest of network settings based on your environment. If you do not see “Thunderbolt Ethernet Slot X”, you will need to add one by clicking on the “+” button.

NOTE: Any network modifications must be applied to the “Thunderbolt Ethernet Slot X” network connection. The “Thunderbolt Bridge” connection on the list is NOT a valid point of access through the Thunderbolt Dock. The Ethernet ports on TS1, TS2, TS3, TS3 Lite and TS3 Plus can support IEEE 802.1X protocol.
Additional Information:
Jumbo Frame Support in CalDigit Thunderbolt Docks
My Ethernet port on the Thunderbolt Station works intermittently

