Jumbo Frames are Ethernet frames that can carry more than 1500 bytes of payload and can go up to 9000 bytes. All CalDigit Thunderbolt Docks can support Jumbo frames.
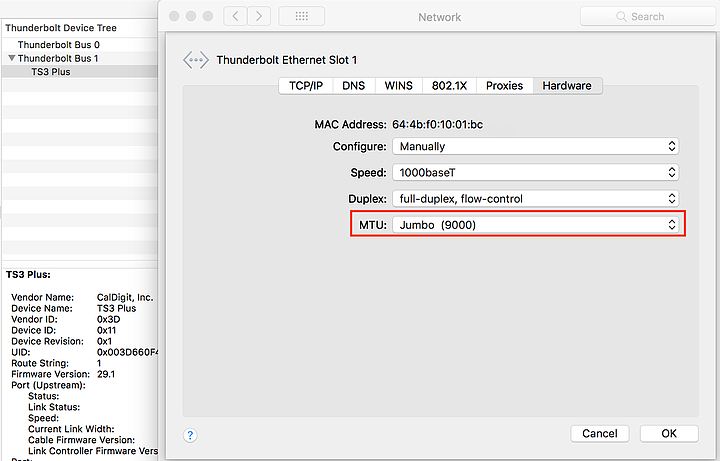
To enable Jumbo Frames in macOS:
- From the Apple menu, choose System Preferences.
- Click Network.
- In the left sidebar, select “Thunderbolt Ethernet Slot X” for your CalDigit Thunderbolt Dock.
- If you see a lock icon in the bottom left corner, click the lock icon and enter your administrator password.
- Click the “Advanced…” button.
- Click the Hardware tab.
- From the Configure: pop up menu, choose “Manually”.
- From the MTU pop up menu, choose “Custom” or choose 9000.
- Click OK, then click Apply to save your changes.

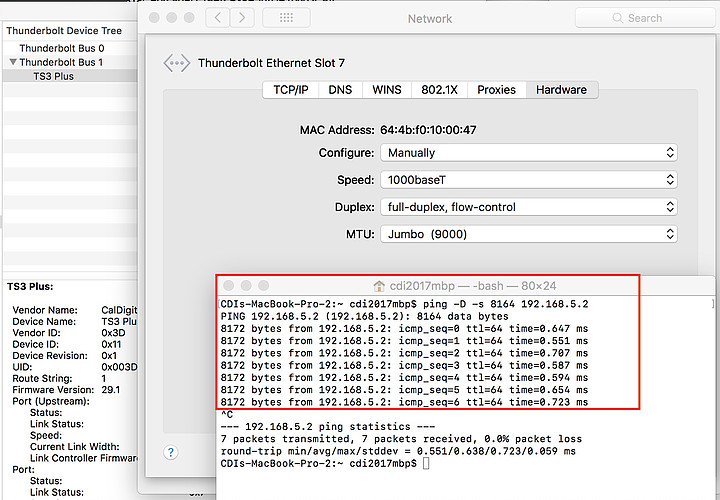
To test Jumbo Frame in macOS:
- Go to Terminal Application.
- Type in the command: ping -D -s 8164 [Your destination IP], then hit enter. You will see more than 8000 bytes back from destination machine.

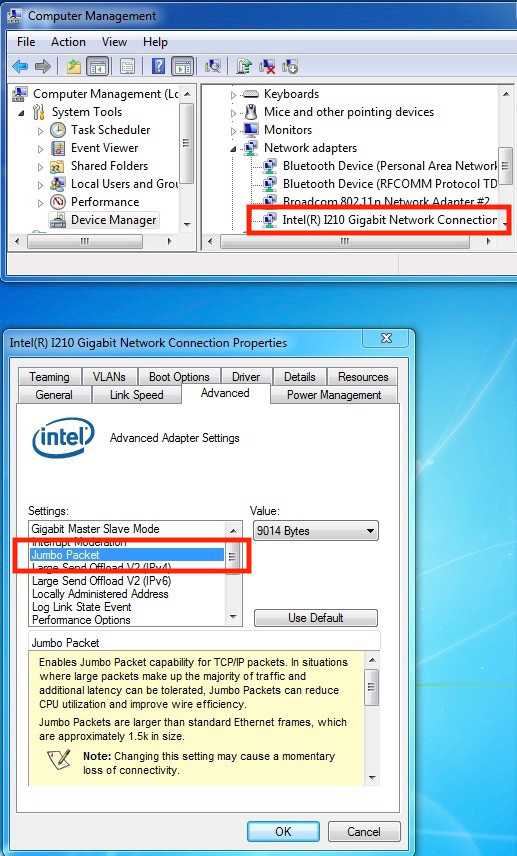
To enable Jumbo Frames in Windows:
- From Windows Device Manager, choose Network Adapters.
- Choose Intel I210 Gigabit Network Connection, right click on it, and choose “Properties”
- Click on the “Advanced” Tab in the Property section to find “Jumbo Packet” and set the Value to 9014 Bytes, then click OK.

To test Jumbo Frame in Windows:
- Go to DOS command line.
- Type in command: ping -f -l 9000 [Your destination IP], then hit enter. You will see more than 8000 bytes back from destination machine.
Note 1: Your Gigabit Ethernet Switch, Destination Machine and OS must support jumbo frames.
Note 2: The Packet Size in Ping command may be slightly smaller or larger than the example above (8164).
Note 3: If you have enabled Jumbo Frames on both sides, but see the “Message too long” message from the Ping command, try to reduce the Packet Size to 8100 in Ping command.
Additional Information:
Jumbo Frame Support in CalDigit USB-C Dock
Wikipedia: Jumbo Frame

