All the CalDigit storage can be configured as an NFS storage from NFS server. Here is an example.
NFS Server Environment:
Xserve 2.26, Model: A1279
Mac OSX Server 10.5.8
IP Address: 192.168.1.187
CalDigit HDPro 2TB
NFS Client Environment:
CentOS 5.4
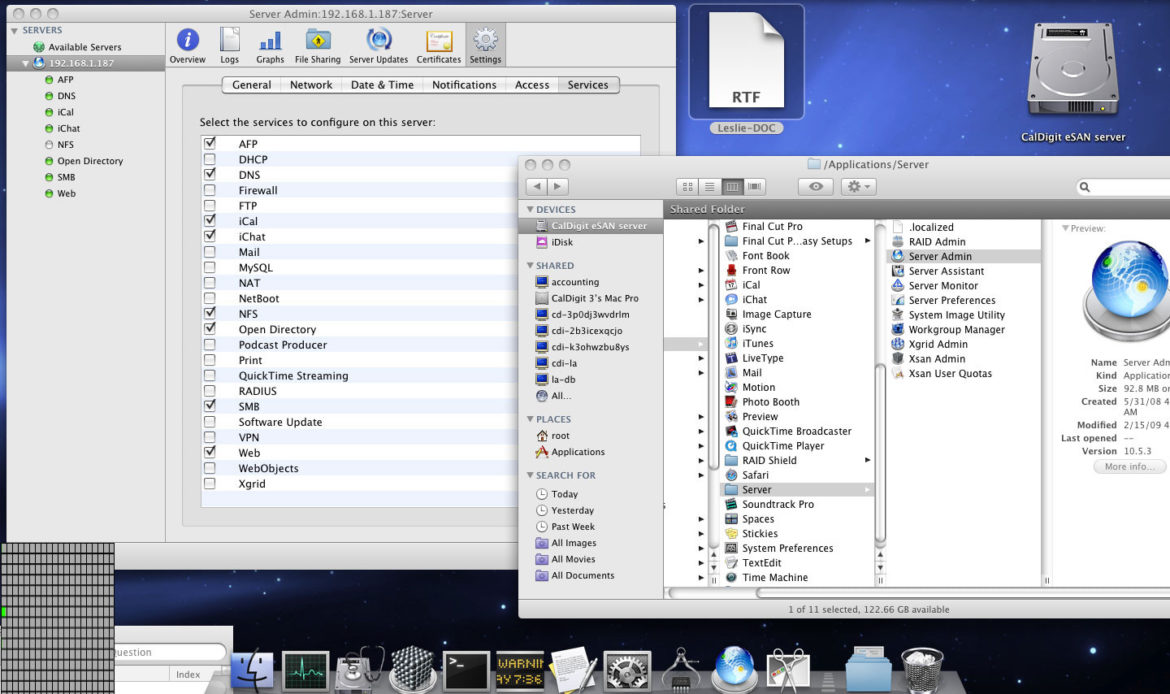
1. From Xserve, launch the “Server Admin” and go to “Services” tab, check on “NFS” service.
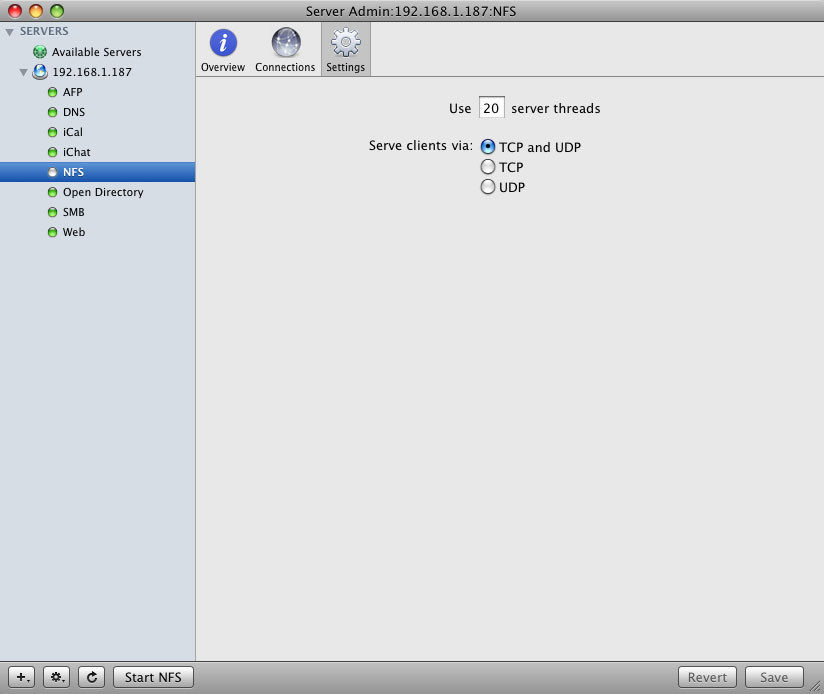
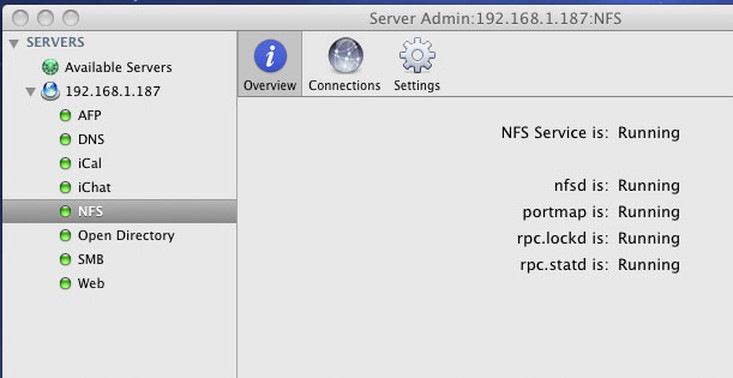
2. Click on the service on the right panel. Check the settings, make sure you enable both TCP and UDP. Then click on “Start NFS” button on the bottom of window to active NFS service.
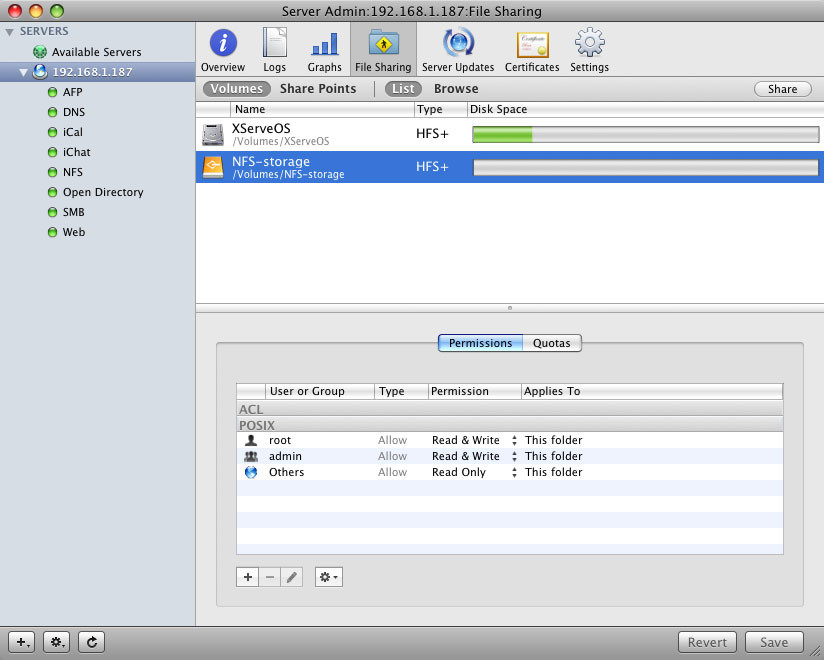
3. Click on the Server and go to “File Sharing”. Select the HDPro (In this example we name it as “NFS-storage” in Disk Utility ), and click on “Share” button.
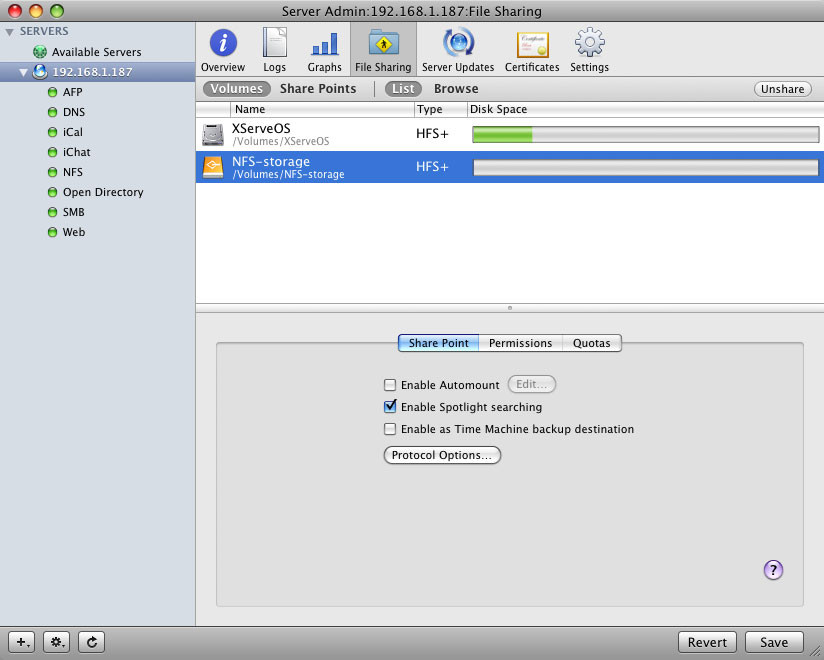
4. Click on “Protocol Options…”
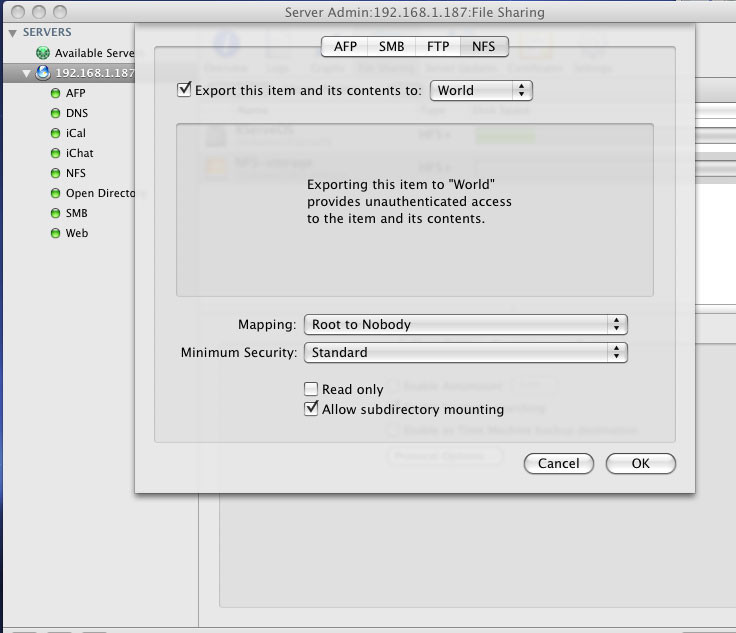
Go to NFS tab, and enable “Export this item and its contents to World”.
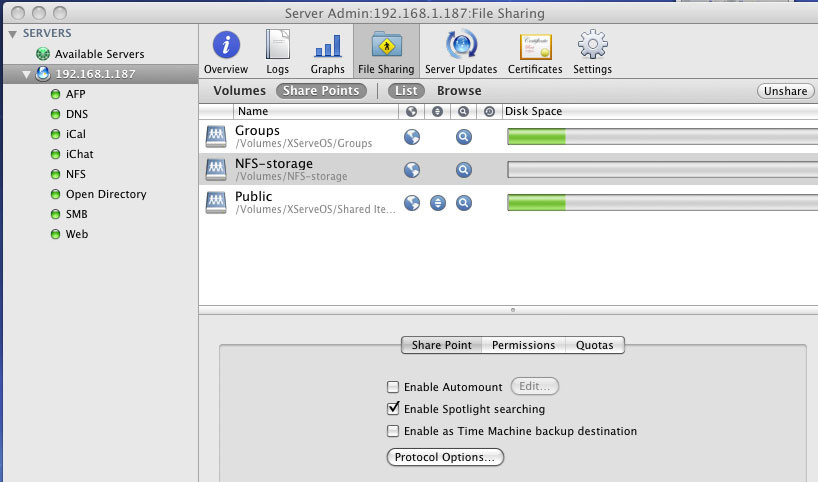
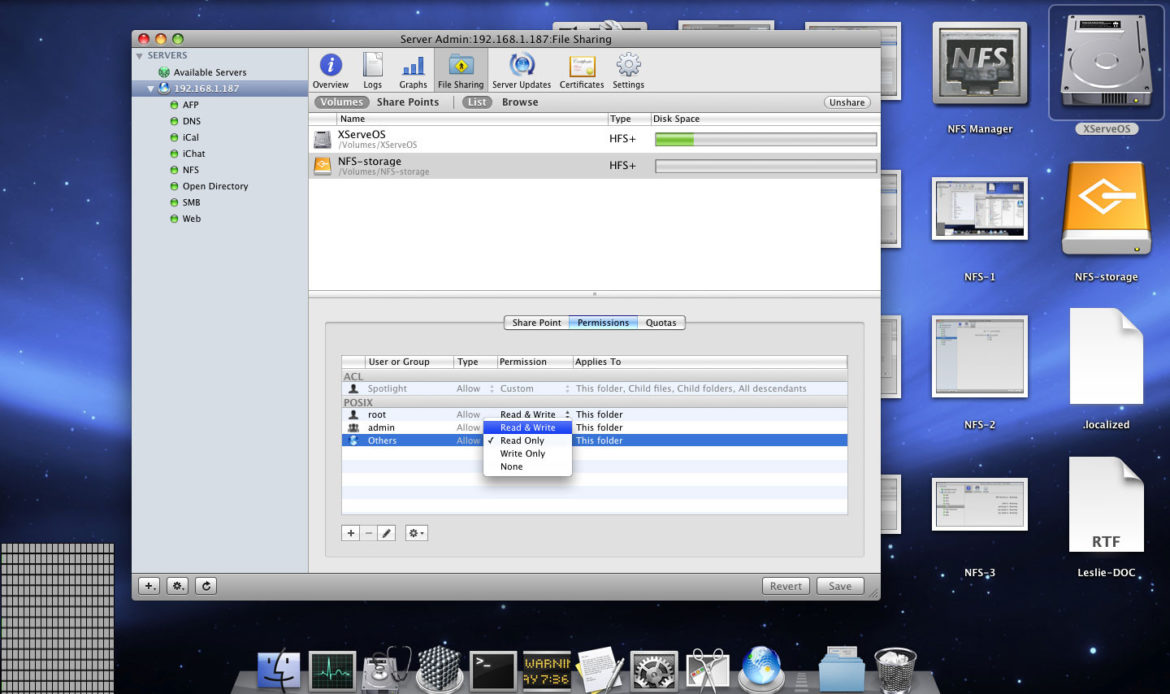
5. Click on “Permissions” tab and enable both “Read & Write” to all other users in this NFS service.
6. Go to System Preference and select “Security”.
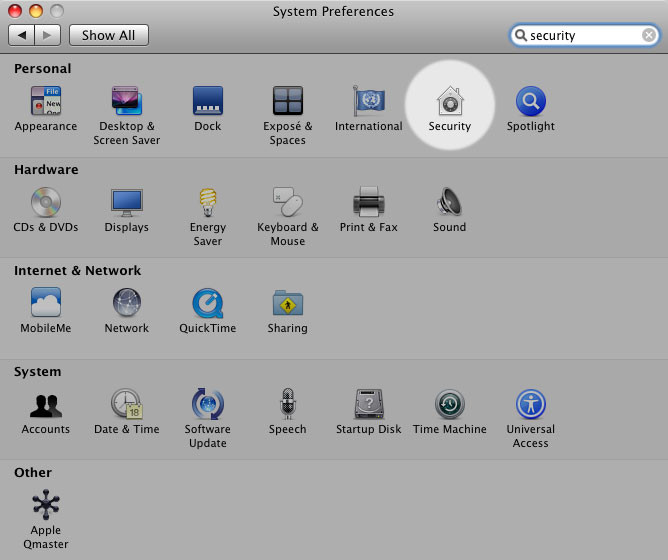
Click on “Firewall” tab and allow all incoming connections.
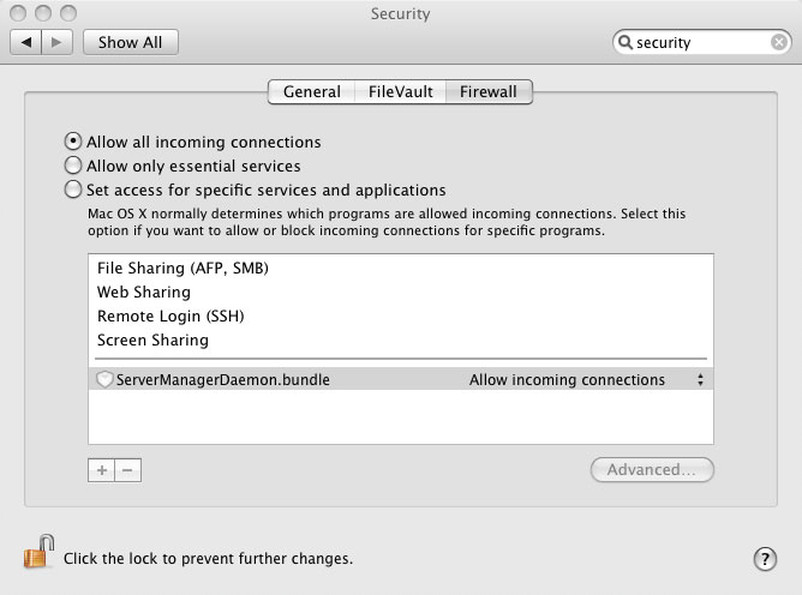
P.S. To simplify the workflow, in this example, we would turn off firewall and all security checkings. Please consult with your network and system administrators for any firewall or security settings.
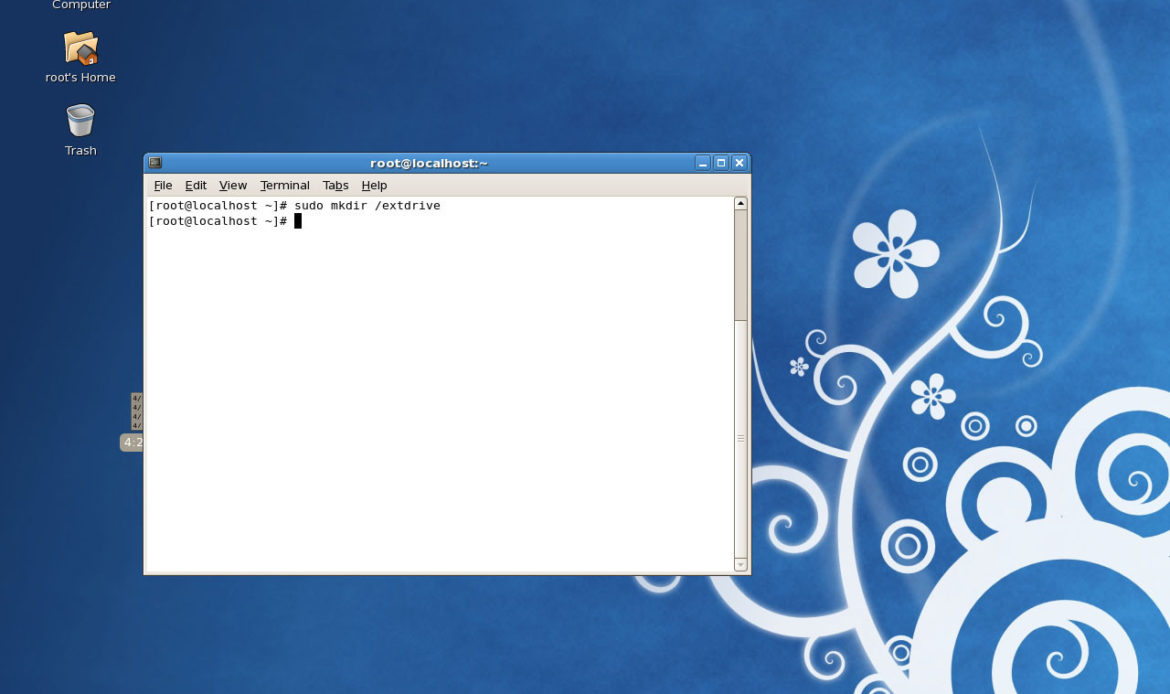
7. From the Cent OS, go to Terminal and create a new folder called: extdrive sudo mkdier /extdrive
8. Go to “etc” folder from your File System and look for fstab file.
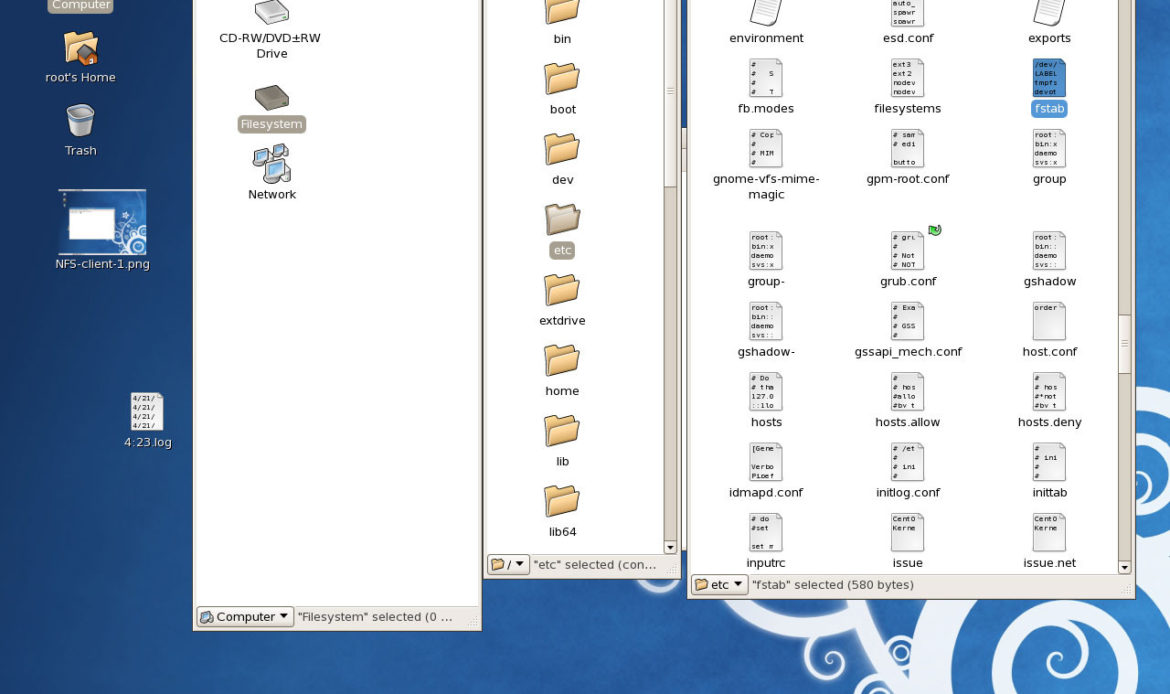
9. Open fstab file and add the following line: 192.168.1.187:/Volumes/NFS-storage /extdrive nfs and save file.
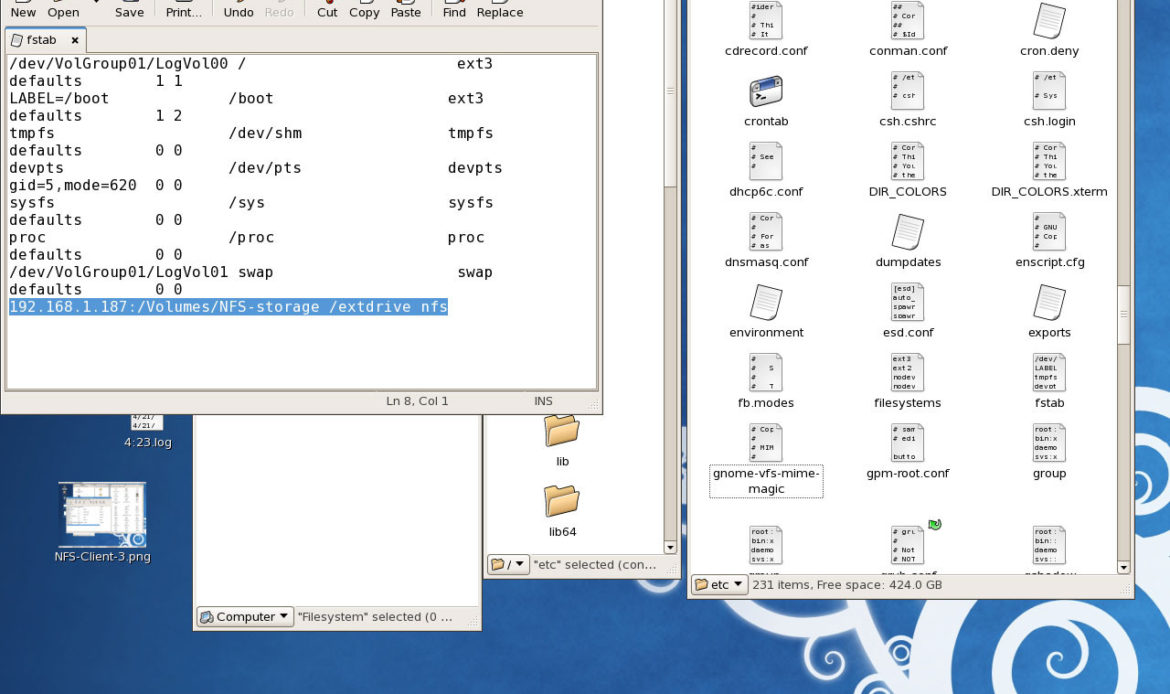
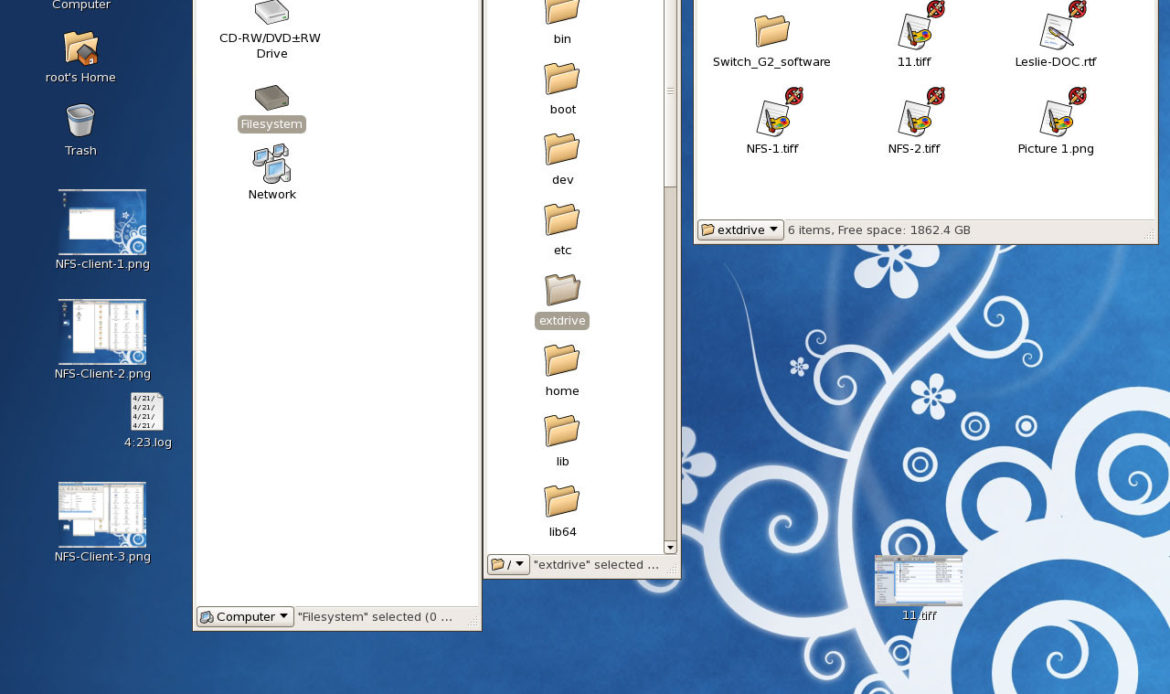
10. Restart your CentOS. Go to FileSystem and “extdrive” folder, you will see files and data from NFS-storage volume located in Xserve.
Additional Information: External reference:
How to configure an NFS share from Mac OSX to Linux
http://www.williamrobertson.net/documents/nfs-mac-centos-setup.html
NFS Manager
http://www.bresink.de/osx/NFSManager.html
How to get NFS disk serving working properly OS X Server http://www.macosxhints.com/article.php?story=20100219094419683

